DIY Divoom
After seeing the little divoom screens all over TikTok I decided that I really wanted one. After looking at the price of them and seeing some people building their own I decided building would let me have a bigger screen and also save money. The following library can help anyone wanting to do the same get the basic setup going https://github.com/hzeller/rpi-rgb-led-matrix.
My Parts List:
- Raspberry Pi 3b (hopefully you have one)
- Matrix Hat (Choose One)
- RGB Matrix Pi Hat Mini (This is the newer style)
- RGB Matrix Pi Hat (This is the one I used)
- 5v 5a Power Supply
- RGB Matrix Screen (I went with two so I have 128x64)
My Equipment List:
- TS100 Soldering Iron (this is mine, use what you have)
- Rosin Core Solder
- Helping Hands (these just make things easier for soldering)
Alright so now that you have all the equipment you need (if you used the affiliate links above, thank you!) you can get started. First piece is if you have the Pi Hat that I said I used it will need to be modified using this guide from adafruit, https://learn.adafruit.com/adafruit-rgb-matrix-bonnet-for-raspberry-pi/driving-matrices, step 3 you will need to solder GPIO4 to GPIO18 like specified but the trade off is you wont have HDMI or Audio jack audio.
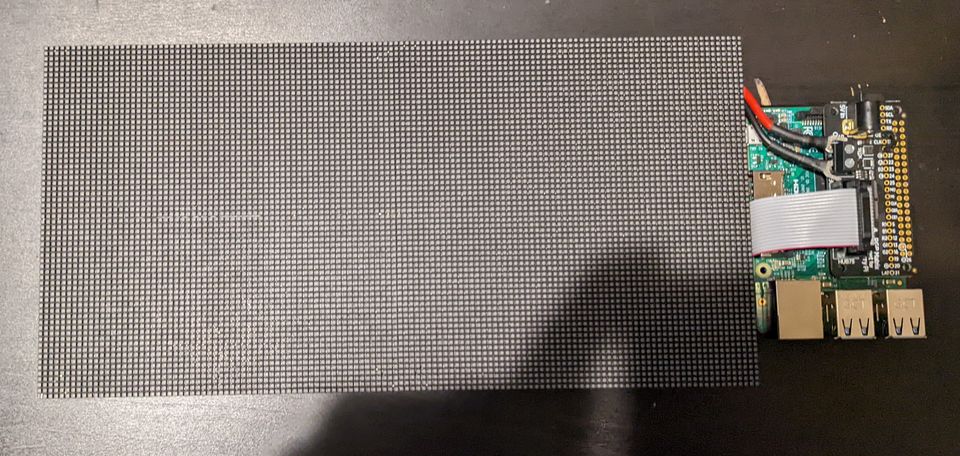
Once you have that all ready it's time to test out your completed project using the testing libraries found here https://github.com/hzeller/rpi-rgb-led-matrix. The image feature for this article is me testing it out in it's current working situation. My next post will be my 3d model that I am working on and how I designed it for this.